
In this mod tutorial, we will cover the basics of creating a new part with texture styles and trim colors. This tutorial assumes you have completed the Getting Started tutorial and you are familiar with the basics of creating mods in Juno: New Origins. This tutorial was last updated with version 1.1 and Unity 2021.3.19f1.
Getting Started
First we create a new mod project. We will name this mod "Custom Part Tutorial". See the Getting Started tutorial for more info on this. Next, import the Custom Part Tutorial Assets unitypackage into the project. This contains the meshes and textures needed to complete this tutorial. At this point, the mod should be in a state that it can be built and loaded into the game, even though it does nothing yet.
Importing Part Meshes
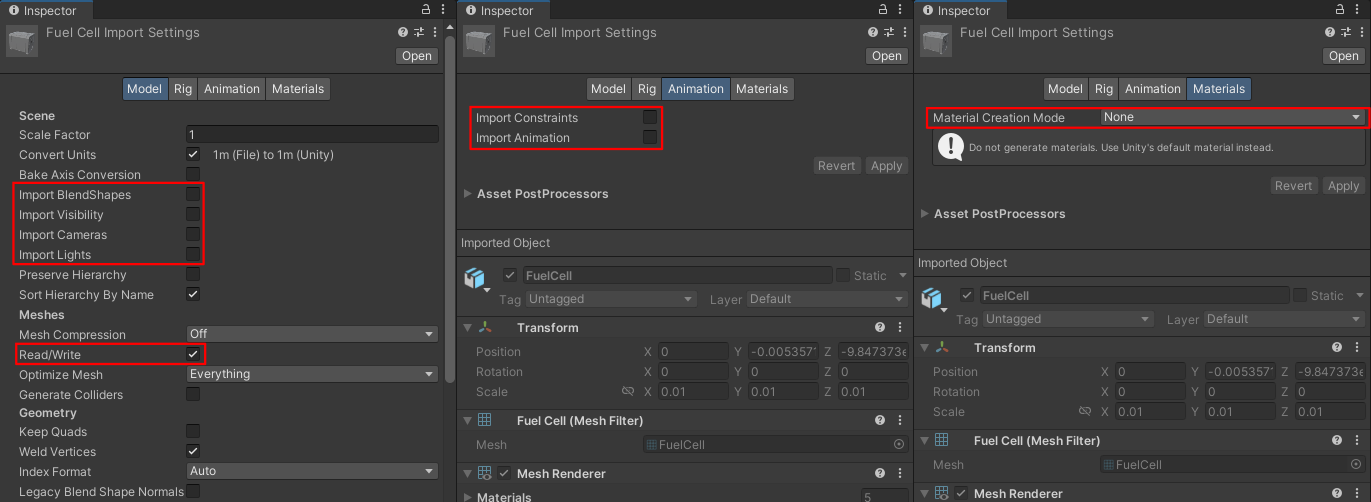
During the setup steps above, we imported the tutorial assets. During this process, a FuelCell model should have been imported at "/Assets/Content/Craft/Parts/Meshes/FuelCell.fbx". We should tweak the import settings a bit on this model. Locate and select the model. On the Model tab in the inspector window, we can disable importing of blendshapes, visibility, cameras, and lights. We also need to ensure that the mesh is Read/Write Enabled (should be by default). On the Animation tab, disable the importing of constraints and animations. On the Materials tab, set Material Creation Mode to None. Apply your changes.
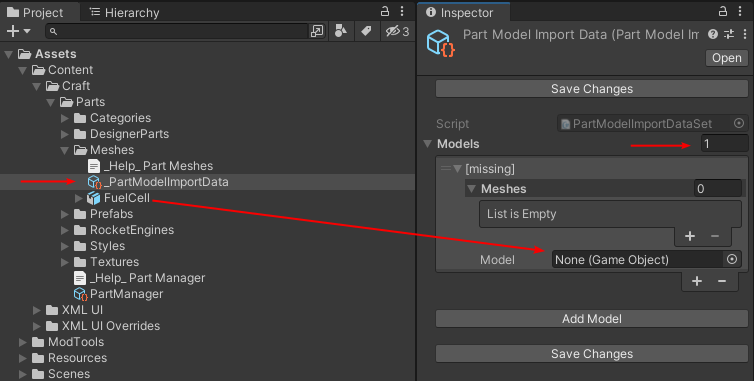
Next, we need to use the _PartModelImportData object to setup the mesh to be imported and used as a part in the game. In the project window, select the _PartModelImportData object at "/Assets/Content/Craft/Parts/Meshes/". In the inspector window, expand Models and set the size to 1. Expand the fields on the new item until you see the Model field. Assign the FuelCell model to the Model field.
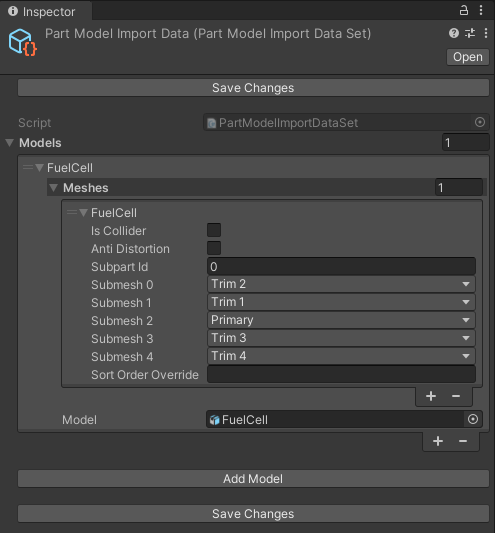
Once the model is assigned, assign the subpart ids and submesh trim levels as seen the the screenshot below. When done, makes sure you click the Save Changes button at the bottom of the window.
Note: PartModelImportSettings - What do they do?
The part model import data settings are saved to model files and are used during the import process for the model. For the imported model, submeshes will be merged together and the 'w' channel of the first UV set will be overwritten with subpart/material data.

Subpart Ids affect the texturing of parts. They are a way to assign different textures to different meshes within an individual part. All meshes belonging to the same subpart of a part will share the same texture.

Submeshes are used to allow a mesh to be colored with different trim levels in the game. The import data settings allow you to assign each submesh of each part mesh to a specific trim level.
Adding New Parts
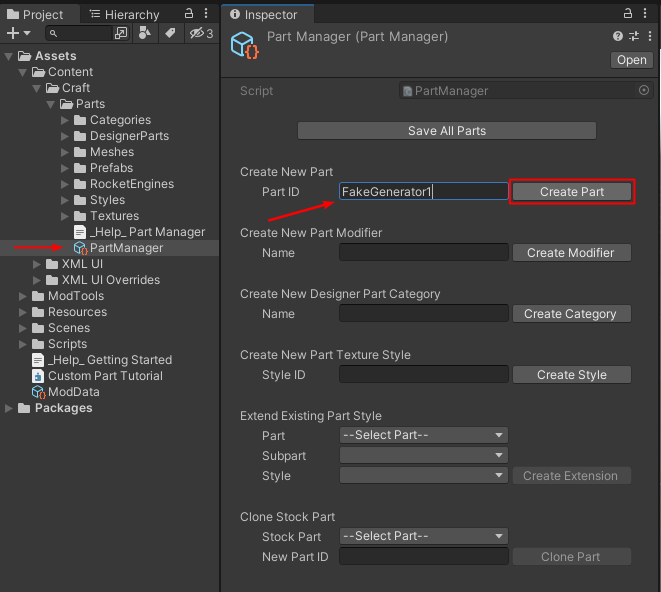
We use the PartManager object to create a new part. Select the PartManager at "/Assets/Content/Craft/Parts/". In the inspector window, put an ID for your new part and click "Create Part".
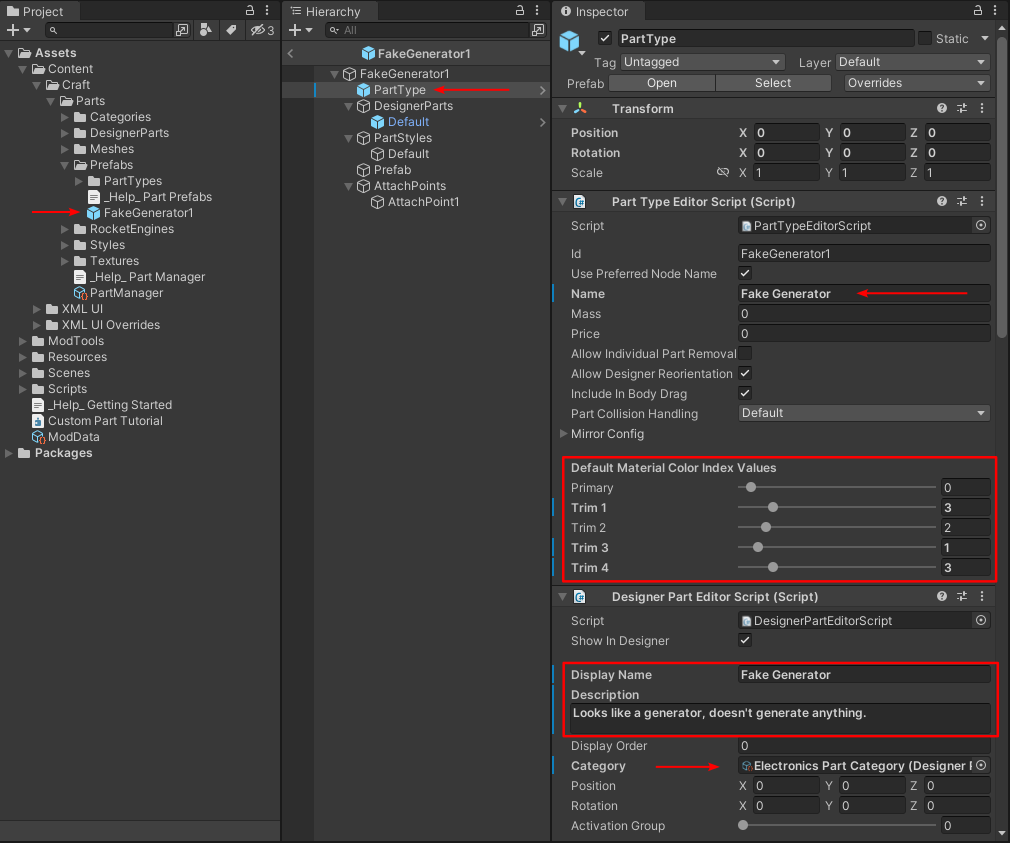
Now select the PartType in the Hierarchy tab, and use the Inspector to set the Name, Default Material Color Index Values, Display Name, Description, and Category as shown in the image below.
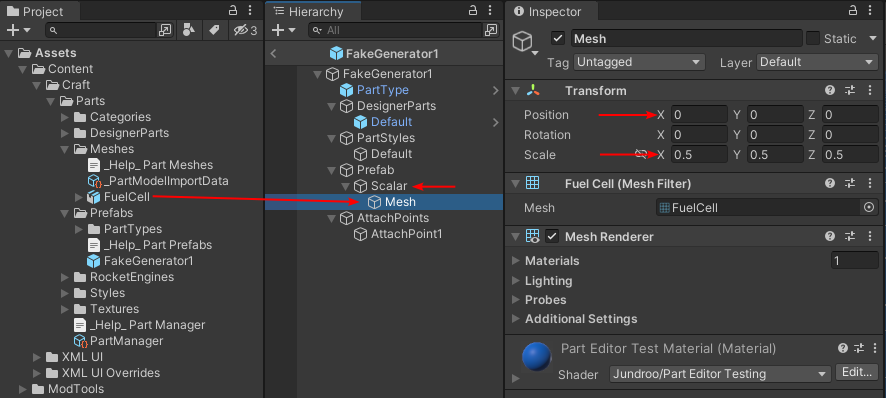
Then create an empty child called "Scalar" under the Prefab object, add the FuelCell mesh as a child to the Scalar, and set its position and scale as in the screenshot below.
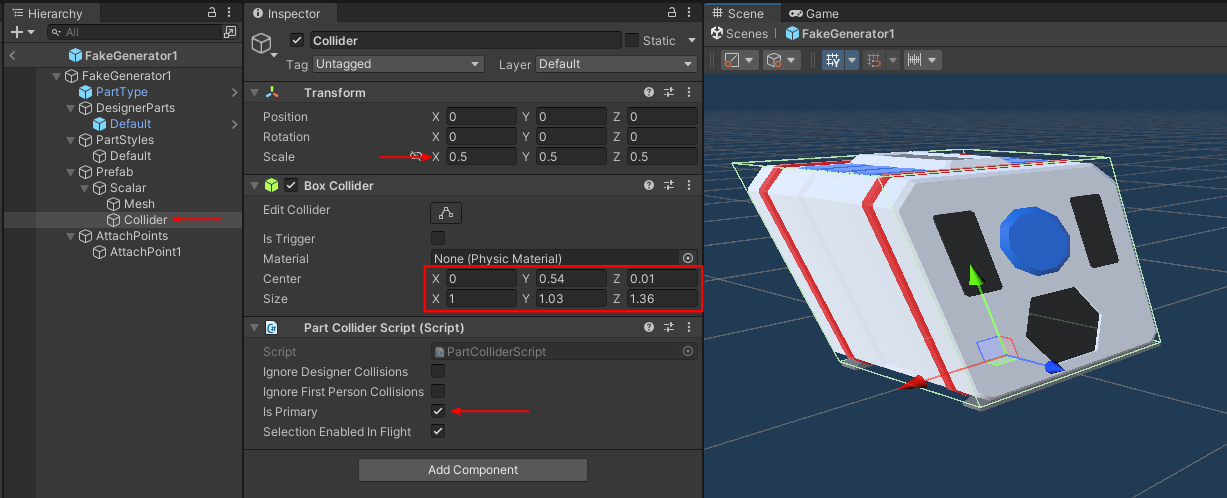
Next we add a Collider, set the scale, collider center and size, then add a Part Collider Script and check the box for Is Primary.
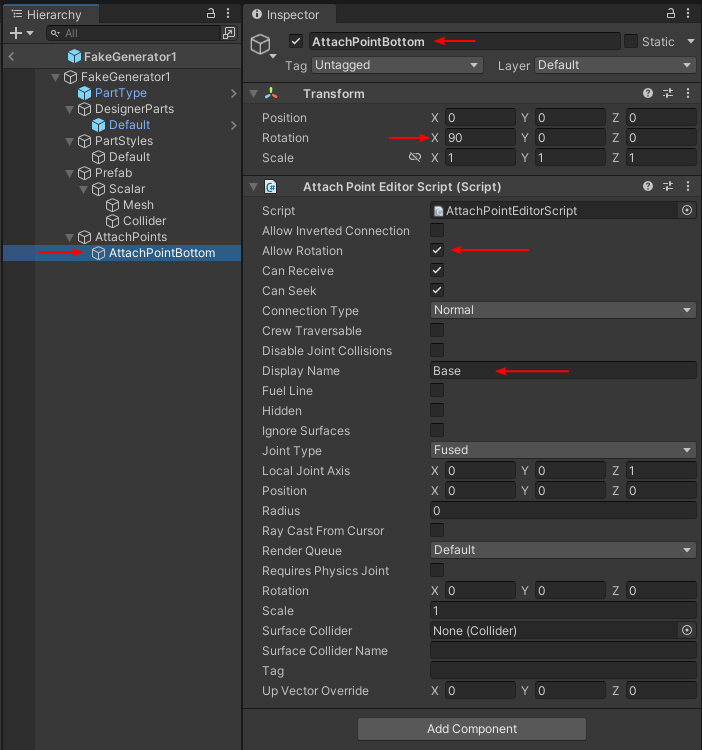
Rename AttachPoint1 to AttachPointBottom, set x-rotation to 90, enable Allow Rotation, and set the Display Name to Base.
Then at the top level object select GenericPart from the Part Definition's Add Modifiers dropdown, click add, and then adjust the properties on the modifier script.
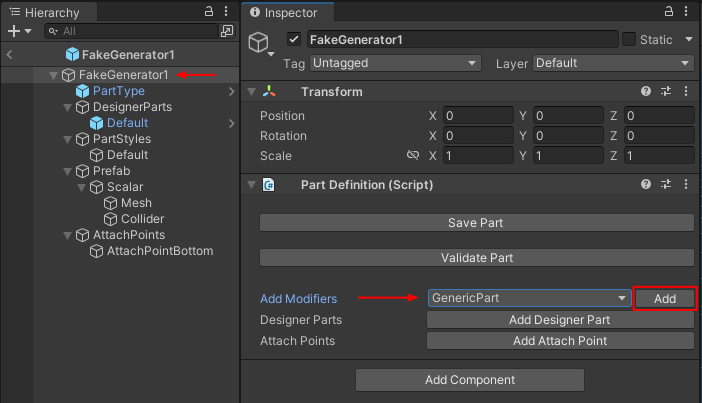
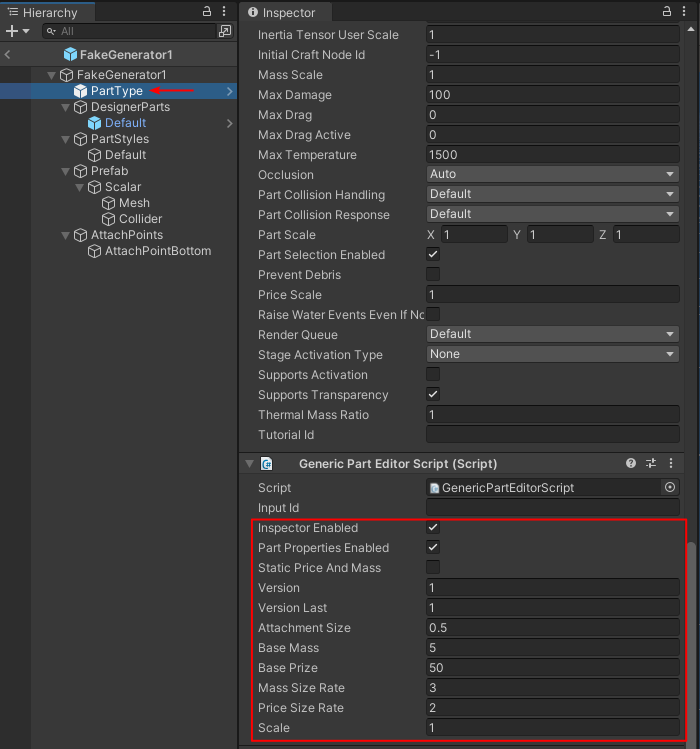
This modifier will allow designer scaling of the part under the Scalar object we created earlier.
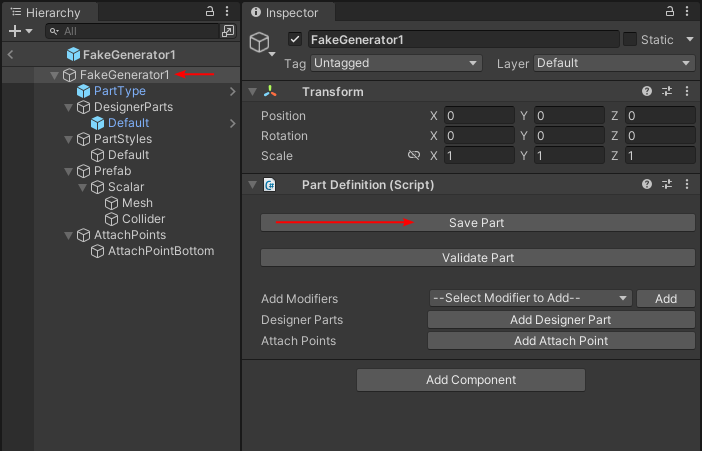
Now select the top level object again, and click "Save Part".
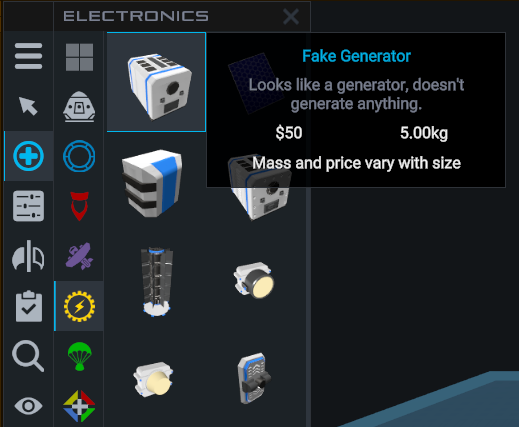
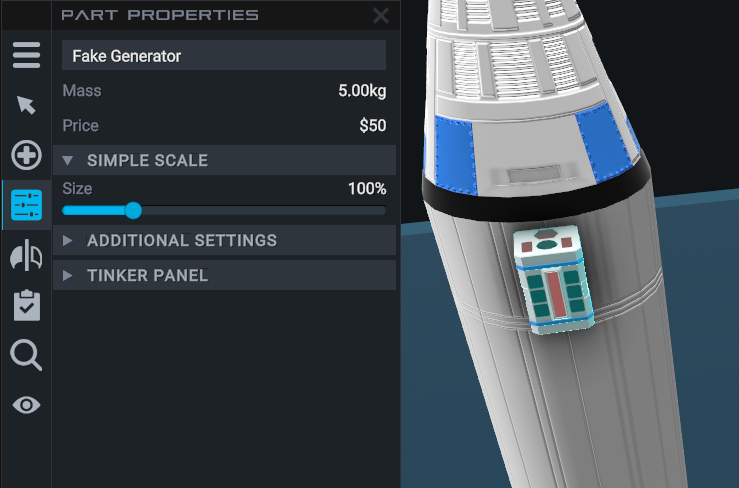
We should now be able to test the part. Save the mod (debug mode is fine for now) and enable it in the game, then go to the designer and drag the new part out.
Texture Styles
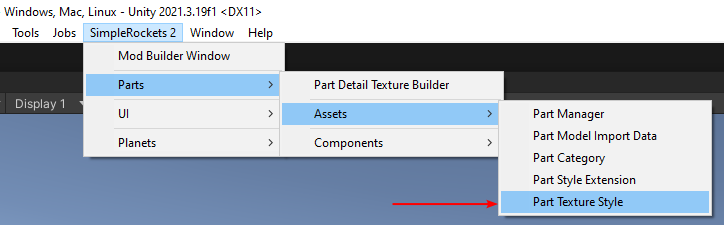
Currently the part has no texture, so we'll go back to Unity and create some texture styles. A texture style is a combination of a detail texture and normal map texture (both optional), along with some configuration data. Both detail and normal part textures should be 1024x1024. We can create a new texture style by going to the SimpleRockets 2 menu bar item, selecting Parts and then Assets, and finally selecting Part Texture Style.
Rename the new texture style to "TutorialGeneratorStock", update the Id to "TutorialGeneratorStock" and the Display Name to "Generator". Assign the "FuelCellDetail" to the Detail Texture field and the "FuelCellNormal" to the Normal Map Texture field. Repeat this process for the diamonds texture using the Id of "TutorialGeneratorDiamonds" and the display name of "Diamonds"

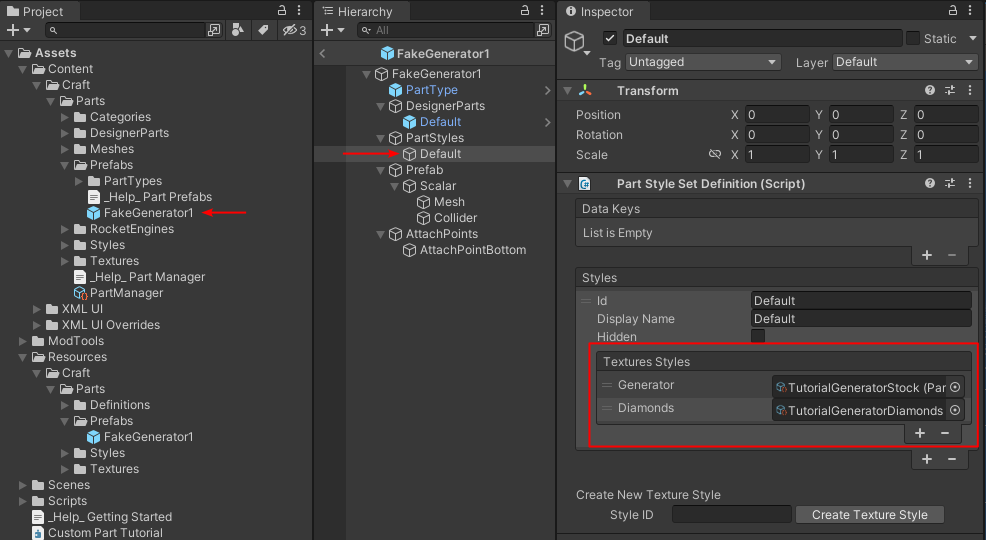
Next, return to the part prefab, select the Default object under PartStyles, and add both of the new texture styles to the default style.
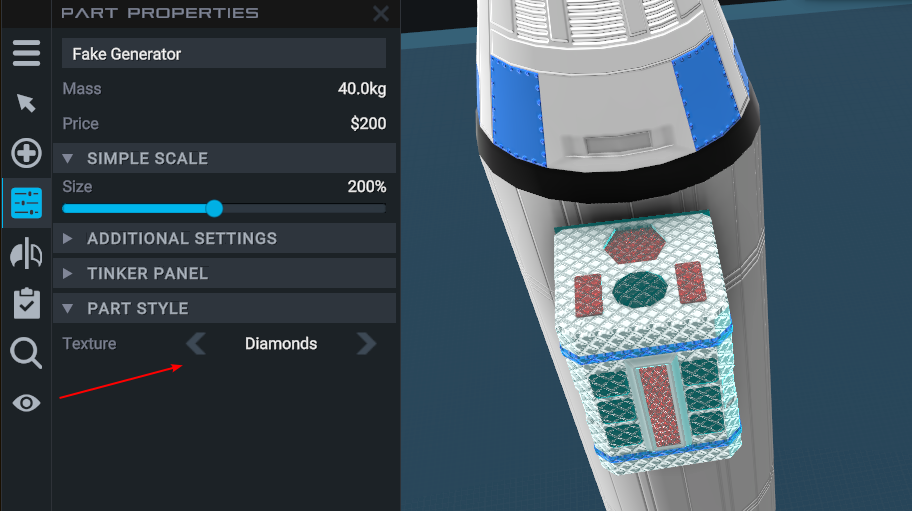
Finally, save the part again, then save the mod, enable it, and we should be able to select our textures in the designer under Part Style.
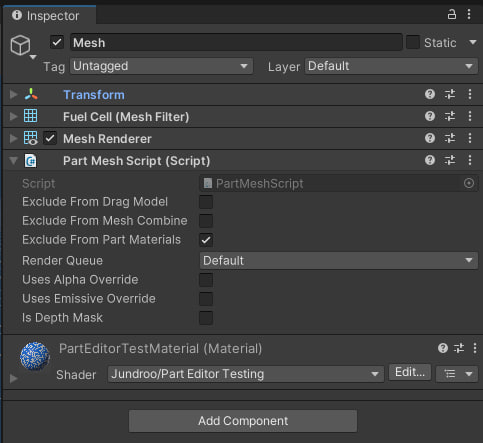
If you want to use custom textures all you have to do is use your own material in the part and then add a PartMeshScript to the Game Object containing the mesh to check Exclude From Part Materials.
Keep in mind that if you go with the Standard shader your part won't get some of the visual effects from the game, since version 1.2.2 our shaders are included in the mod tools, so you can select Jundroo/SR Standard/SrStandardObjectShader to have the atmosphere scatter effects while being able to use colored textures or tweak Jundroo/SR Standard/SrStandardPartShader to adapt it to your needs.
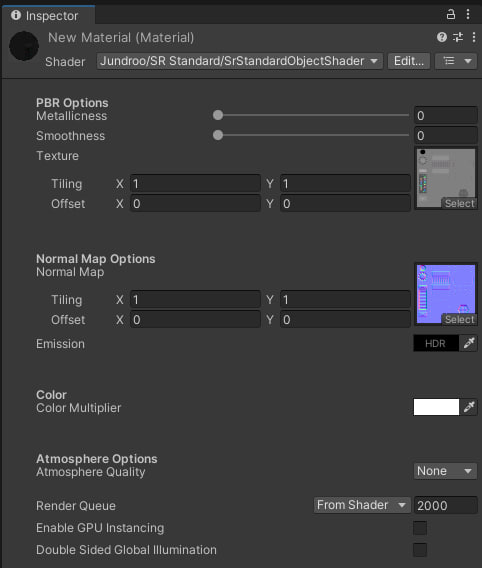
The example attached in this tutorial predates said shaders, so remember to upgrade your project to the correct Unity version and import the latest Mod Tools.
That should cover the basics of how to create a new part with paintable colors and custom textures. Let us know if you have any questions. The full Unity project for this tutorial can be found here.


@Thatguy2020nowonjuno wait I just realized you haven’t posted here in like a year lol