
Credits!
Credit goes to Alpha Space Technologies (for the existing airframe, Fire Control System, Ordinances shown, and for cockpit modeling), Triton Aerospace for the Airspeed Autopilot, RokuGou systems for the frontal aspect AWS, IcEStaR for the Primary Flight Display featured in the cockpit, HoverArrow for the 360° craft proximity radar (separate from the Fire Control System's radar), and to Beacon Industries for making the absolutely stunning visual overhaul on the exterior and bringing the jet to life!
Description!
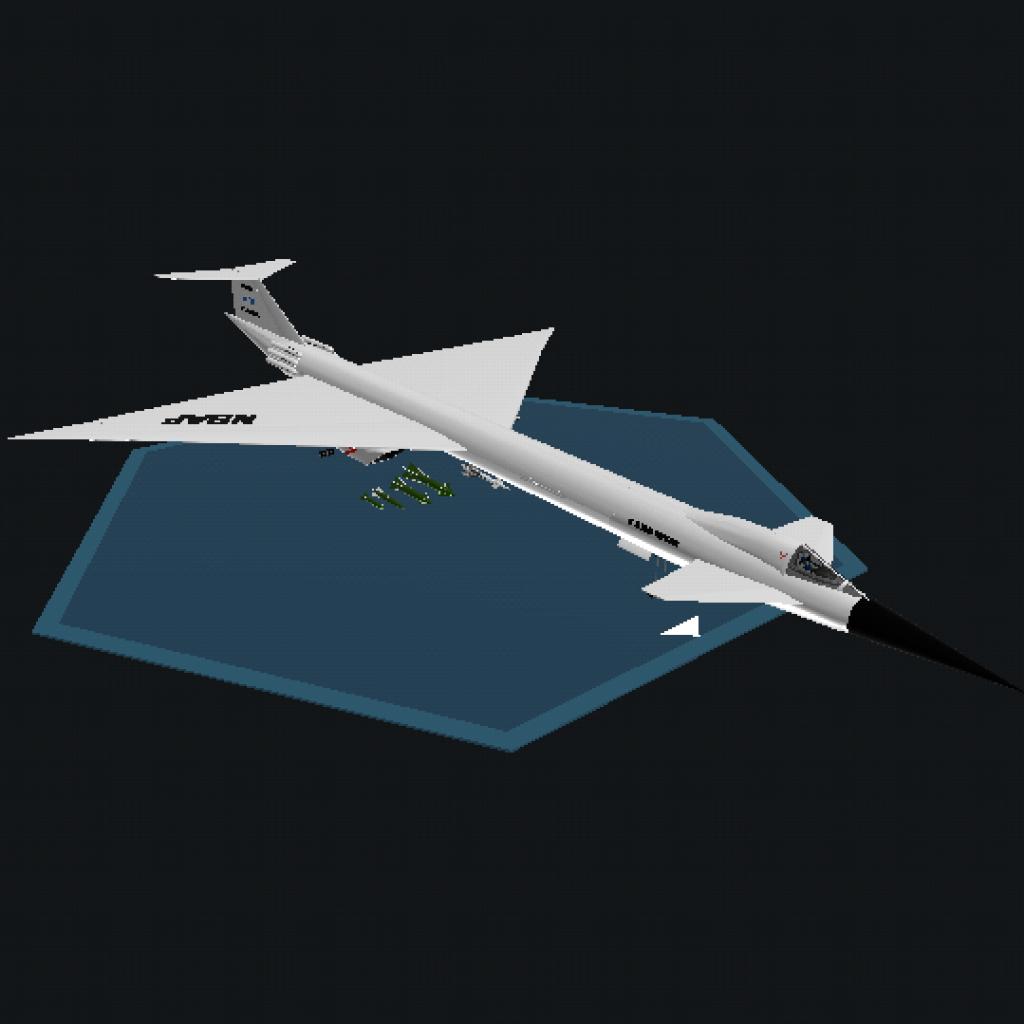
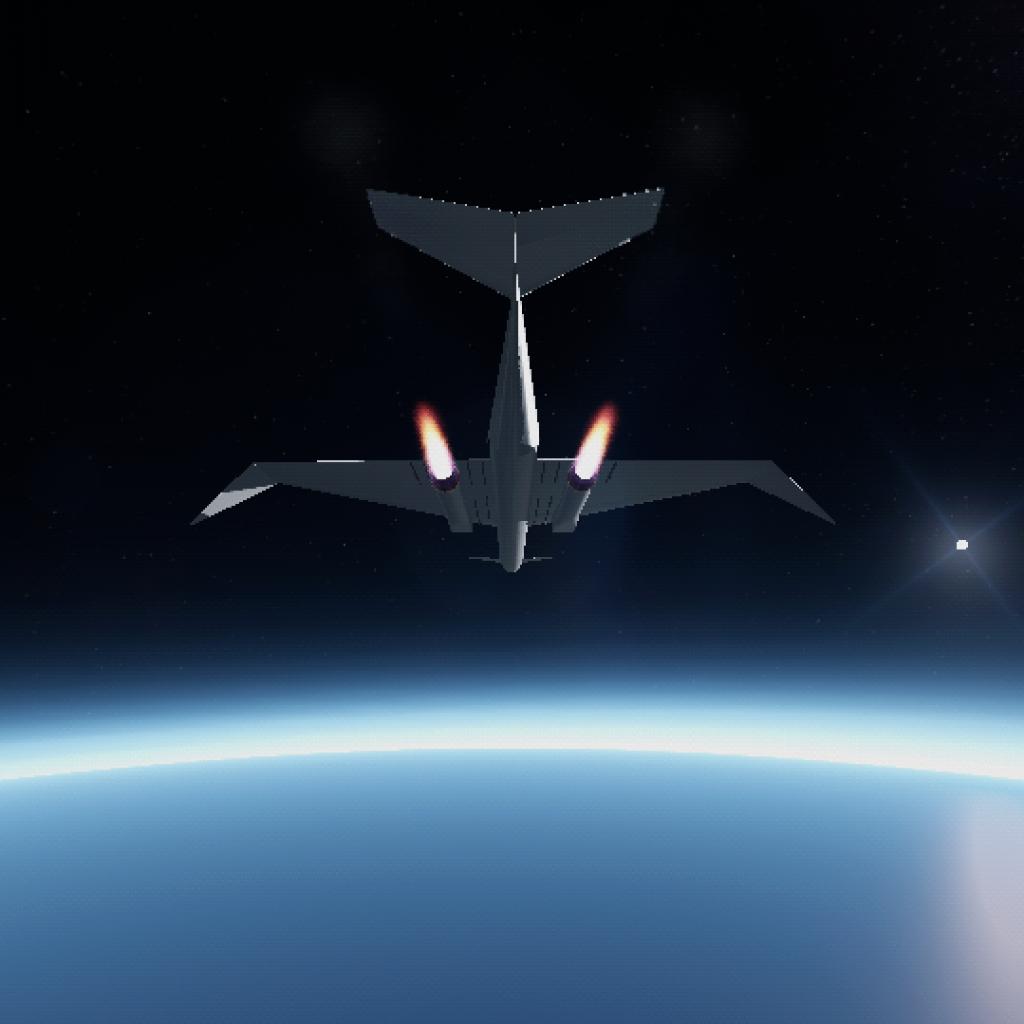
The B-44 "Grizzly" Block 2 variant is the newest overhaul of our powerful bomber. This new variant is loaded with many new features and capabilities considered unprecedented both by competition and by our own standards. It features a extensive renovation of the bombers external paint job, improvements to its airframe, targeting and fire control capabilities, decreased pilot workload, and a serious improvement in the safety of operating the bomber itself, all while still retaining the state of the art airframe and powerplants that allows this bomber to remain an uncontested champion of the high skies!
Instructions!
(From take off, to flight, to dropping bombs, and to landing, and everything in between!)
Take-Off
JATO Boosters
If you decide to keep the rear tail JATO boosters attached. You can begin to arming them, by pressing Activation Group 2, and fill in the prompts (selecting equipment (3), and then selecting the JATO Boosters (2). You can then either arm these boosters by pressing launch (Activation group 3), or jettison them one by one by pressing jettison (Activation Group 4).
Note: if you do not equip the JATO Boosters, you can disregard this instruction.
Throttle up
Make sure brakes are off, that your plane has the right payload, and that your crew is smiling, ready to go! When ready, increase throttle to 100% and maintain centerline on the runway. If you have the JATO Boosters attached and armed, they will activate once your ground speed passes 20 m/s. At this point, they will fire and your plane will accelerate very quickly down the runway. Once you reach 90 m/s, it is completely safe to pull the plane's nose up and rotate to lift off of the ground. Begin a reasonable 10 or so degree climb, maintaining it with the lock orientation button. Once the boosters run out, they will wait until you are over 100 meters above the ground and then detach automatically and fall away.
Landing gear? No problem!
Trying to figure out how to retract the landing gear (or extend it)? No need to worry. Once you exceed 1000 meters above ground level or exceed 150 m/s in surface speed, the landing gears will automatically retract by themselves! If you want to extend them again to land, simply lower your altitude to below 1000 meters above ground level and lower your speed to less than 150 m/s and the gears will automatically extend back out.
Mid-flight
Ascent
Maintain a close to 10 degree climb, making sure your airbrakes are not extended and avoiding any ground obstacles. Speed is important, both for the plane's survival in a combat scenario, and to improve efficiency, and to maintain flight, so be sure to allow the plane to speed up, especially if you are carrying a heavy payload. This is because your engines need enough air to produce enough thrust to lift youe heavy payload, the faster you go, the more thrust you have and the faster and higher you can fly. The maximum altitude this bomber can fly at is 20000m ASL, although it is recommended to fly closer to around 15000m.
However, DO NOT climb above 23000m whatsoever. Doing so will cause pressure damage to the crew compartment containing the Bombardier, backup pilot, secondary weapons officer, and radar operator. If this compartment receives 100 damage, it will explode with violent force, causing a vehicle breakup midflight, killing all of your crew. And you don't want that, at least we hope you dont.
Helpful Tip: if you dont care about flying as fast as possible and instead want a more stable cruise, you can activate Airspeed Autopilot and enter an airspeed youd like the airplane to fly at. As long as its within the limits of the airframe, the jet will do the rest of the work of getting up to that speed and maintaining the right amount of throttle to keep that speed, lessening the workload on you.
Selecting a target
As you are climbing, it is also a good idea to set a target in mind. It can be an area to fly around for reconnaissance, or a target or formation that needs bombing. Whichever may be the case, using Activation Group 5 or 6 will set a target for you based off of nearby crafts within radar range.
Its not the target you want? No worries! Simply cycle through targets by pressing Activation Group 5 or 6 until you get your desired target locked.
It is important to note however, that you can not select targets via the map view or by clicking on a craft in the cockpit radar. Those methods are separate from the Fire Control System and your weapons WILL NOT TRACK if you do not use AG 5 and AG 6
Matching heading to target bearing
Once you have selected your target, you may begin turning the jet to make sure its nose and prograde vector align with the target's bearing, which means your heading towards the target. As long as you are flying towards the target, you may continue climbing.
Preparation to destroy your target
Once you are on target, and you have reached your desired airspeed and altitude, you may level off your plane (make sure you do not lose altitude!) and begin preparations to destroy your selected ground target.
Just like with the JATO Boosters, youll also need to arm the weapon type you want to use.
Begin by pressing Activation Group 2.
For all ground weapons available, you enter 2 on the first prompt.
Using Bombs
For guided bombs, you press 2 again on the second prompt. Then enter the number corresponding with the bomb type you have on board and wish to use.
After you have selected your bomb, you may proceed to the next step (Utilizing CCIP Program, Activation Group 8)
Using Air to Ground Missiles
For air to ground missiles (AGM's), you enter 1 on the second prompt. On the third prompt, you enter the number that corresponds to the AGM you have onboard and wish to use.
Once you have selected your AGM, you can fire at any time as long as you are within the alloted range that your AGM can travel. You do not need to use the CCIP Program (Bombardier Mode; Activation Group 8)
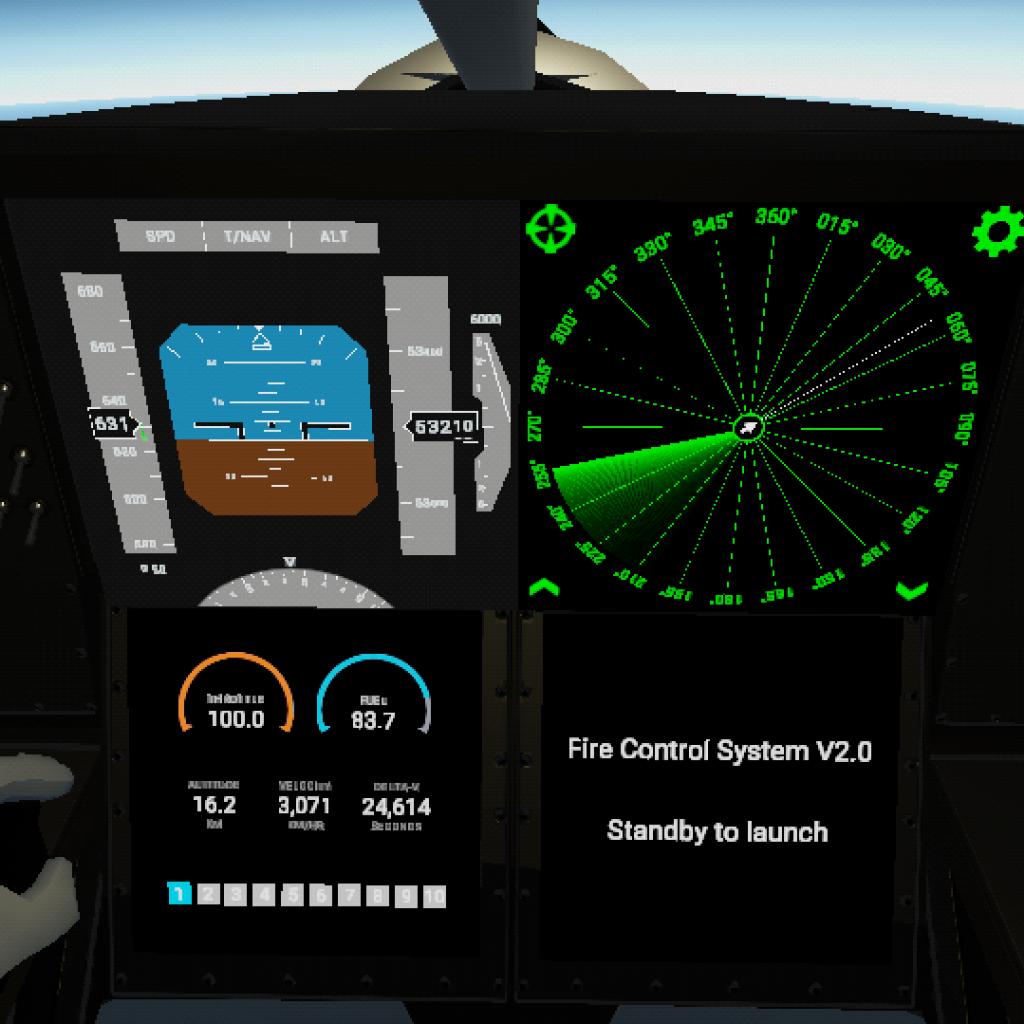
Utilizing CCIP Program Bombardier Mode
To drop bombs on a target, you need to be flying towards it, and flying fast enough (above Mach 1) that your bombs will be able to go the distance. However, even for guided bombs, its hard to tell when to drop your bombs. Thats why Alpha Space Technologies invented the CCIP Program for this bomber.
CCIP works by utilizing your speed, altitude, and flight angle and computing it to find the estimated horizontal distance, or downrange, that your bombs can travel if you drop at that instant. The difference between this system and real life CCIP is that this system ALSO calculates the horizontal distance between you and your target, using Haversine's formula to calculate great circle distance.
The two values are then compared with each other, and, assuming you are flying faster than mach 1 and have your weapons bay open (Activation Group 7) and a bomb selected, if your bomb horizontal range exceeds your horizontal distance to the target, a green indication will tell you that you are ready to drop bombs. If not, and the status remains red, it will tell you why you cannot drop.
To Activate the CCIP computer, press Activation Group 8, labeled "Bombardier Mode". When the status is green and all conditions are met, you are free to drop your bomb on the target. For added redundancy against any mishaps, it is wise to drop 2 bombs or even 3, in short succession, so even if somehow one misses, another will still hit the target.
Note: The program can tell you that you are not ready to drop your bombs, but it also DOES NOT stop you from doing so either. So you still have full control over when you release your bombs, just with the computer giving you suggestions for a successful bomb drop.
Aerial Threats!
This bombers main role is bombing ground targets into submission with its vast payload options, capacity, and space. It is not an air superiority fighter and flying it as such is a very expensive mistake to make. You should only fly this bomber when you have achieved or are about to achieve air superiority over the area you plan to fly over.
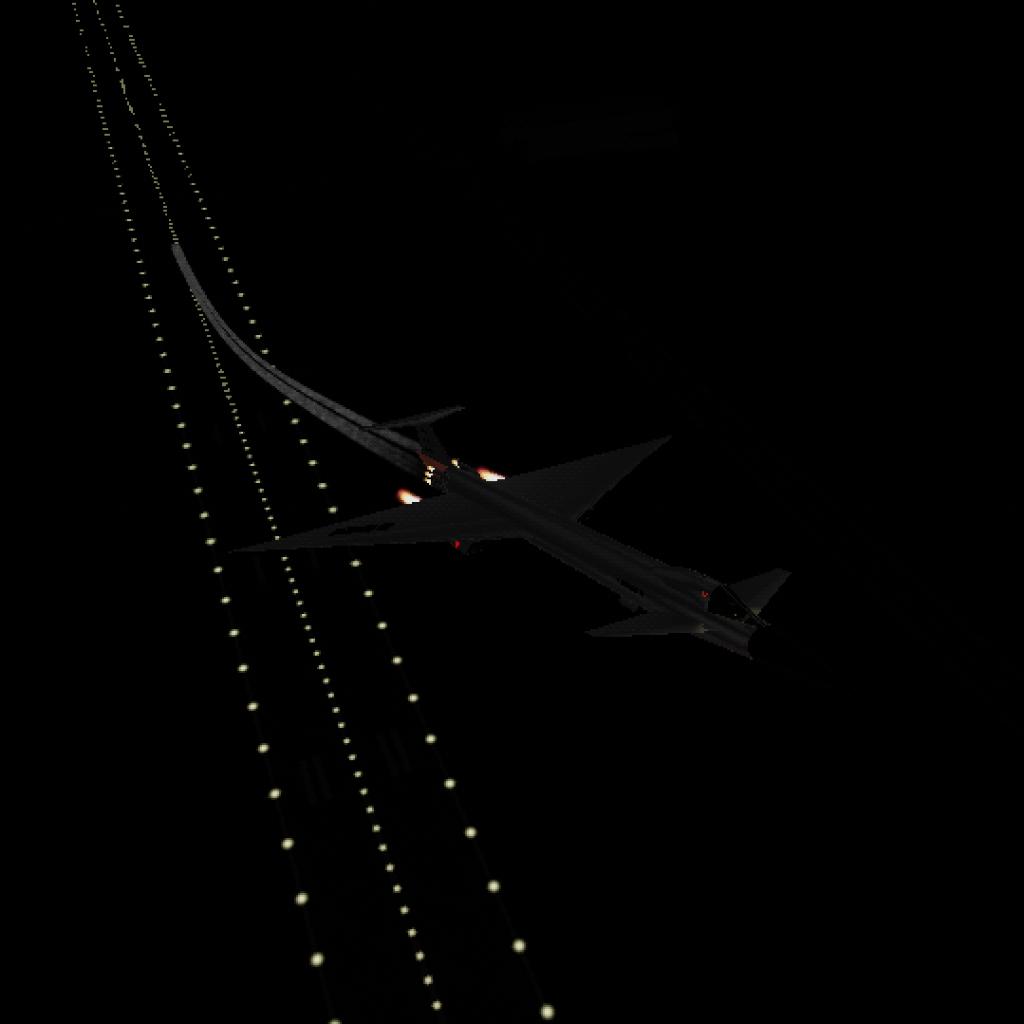
That being said, even flying carefully will NOT stop enemies from utilizing their air and SPAA assets to shoot you down. For that reason, this bomber is made to fly high, blistering fast (at up to Mach 3) and can also carry Air to Air Missiles on external hard points!
Using Air to Air Missiles
To select these air to air missiles, you must press Activation Group 2, then press 1 on the first prompt, and then choose the type of air missile you have onboard and would like to use. Doing so will arm the missiles.
Be sure to have an air target selected before launching the missile! Also keep in mind that, for best results, you want to shoot enemy planes and missiles directly in front of you and within range. Refer to the missile's information page in their respective posts on our profile for more information regarding these missiles.
Missile Incoming! AWS System
When a missile or a light craft is heading towards you at speeds greater than 400 m/s, weighing under 3 tons, and within 100km, the AWS will sound an alarm and display a continuous message that a missile is approaching. At that instant, you should locate and target the approaching threat, launch a missile at it, and begin to climb and apply full throttle. Missiles in general suffer at high altitudes, especially over 20000m ASL, so be ready to zoom climb if need be, but remember to not exceed 23000m.
If the missile is closing in on you (less than 15km), the best chance you have left is dodging and, if high and fast enough, pulling hard to get out of the missiles turning reach.
Landing!
Approach
Once your mission is completed, youll want to head back to base, refuel and rearm. However, there are a few things you need to know before jumping the gun on the runway.
Youll first want to, of course, fly back towards your landing site. But also, as you approach, be sure to lower your airspeed using the airbrakes. For extra deceleration, you can also use the reverse thrust, which works mid air too, like the real life C-17 Globemaster.
Sticking the landing
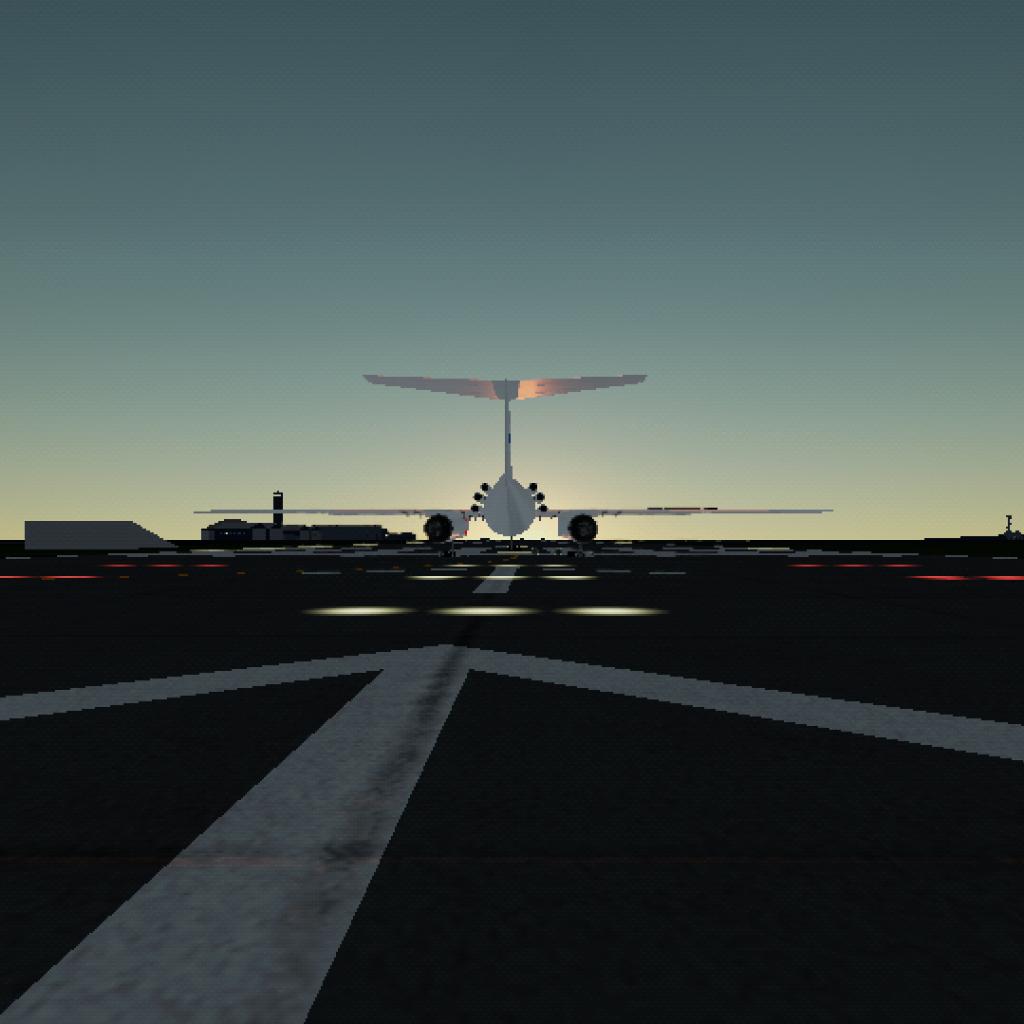
Once your altitude is less than 1000m above ground level and your speed is under 150 m/s, your landing gear will extend again.
By now you should be aligned with, or working on aligning with the runway. Be sure to keep an eye on your airspeed, your approach, and any obstacles that could be in the way. As you are coming down on the runway, you can try to make it a smooth landing if you are experienced enough. But if you dont trust in your abilities, fear not! The B-44 has crazy strong landing gear that will keep the bomber intact in even the hardest of landings. Once the bomber is rolling down the runway, you should maximize the brakes and increase throttle to max to activate the reverse thrusters, along with airbrakes and wheel brakes. If youd like, you can also press Activation Group 10 to deploy the drogue chute to slow yourself down really fast. Once you are on the ground and have come to a complete stop, you can reduce throttle to zero percent, and then once the engines are at idle, you may release the brakes.
Congratulations, you just flew the B-44 and survived!
Specifications!
Top Speed: Mach 3.0 (@ full payload)
Max supercruise: Mach 1.4
Cruising Altitude: 15,000m
Max altitude: 20,000m
Max range (flying at high altitude): 4000 miles on afterburners, 8000 miles on dry mode
Take off speed (VLOS): 90 m/s (175kts)
Stall speed: 70 m/s (~140kts)
Gear extends when below 1000m AGL and slower than 150 m/s, or when grounded. Stays retracted otherwise.
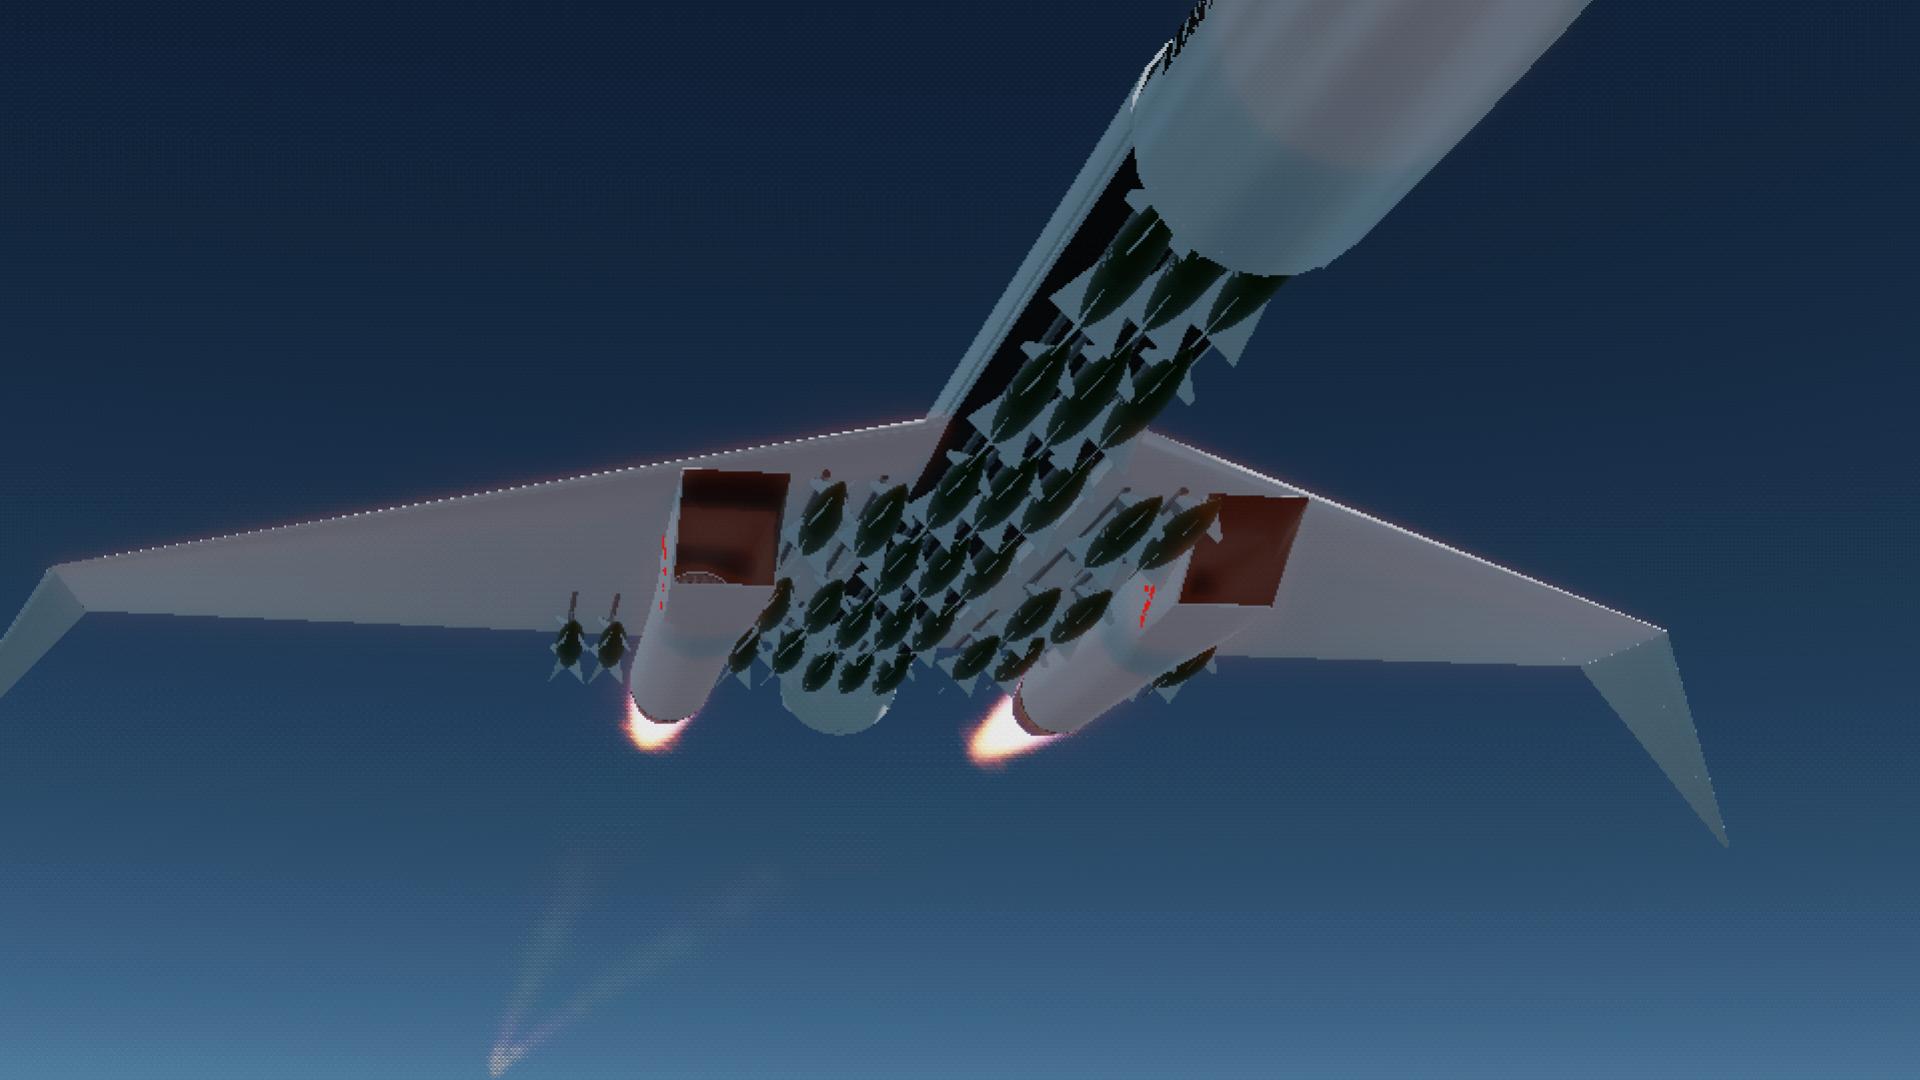
Max weapon payload: 100,000Ibs (~45.35 Metric Tons)
34 weapon hardpoints, 18 internally, 16 externally. There is also 6 JATO pylons on the tail of the plane meant for attachment of Alpha Space Technology JATO Boosters only.
Can be fitted with the Guided Bombs shown in picture, as well as air to air missiles for self defense and detterence, Air to Ground Missiles, and of course, NUKES.
6 JATO boosters, 100KN each burning for 17 seconds, totaling 600KN. (Can be detached if not needed.)
FEATURES!
- New forward canards for improved maneuverability across the board.
- New airbrakes (Brake slider) and drogue chute (Activation Group 10) to be used in conjunction with reverse thrust to quickly slow the airplane down.
- Roll surfaces have been made larger to increase roll rate.
- New wingtips added for extra lift; folds downward XB-70 style at speeds above Mach 1.9.
- Powerful and capable powerplants to deliver the speed, capacity, range, safety, and comfort unmatched by no other bomber.
- New Continuously Computed Impact Point (CCIP) computer to help aid in bomb dropping and carpet bombing. (Activation Group 8)
- New stall warning system and basic GPWS buzzer installed, as part of the Primary Flight Display, courtesy of IcEStaR.
- New forward aspect AWS that detects missiles approaching in front of the jet, courtesy of RoKuGou Systems
- New Airspeed Autopilot to help manage fuel burn and hold airspeed, courtesy of Triton Aerospace. (Activation Group 9)
- Certified for use on Droo Space Center and Ali Base runways.
- New functional cockpit with overhead light, displays mentioned previously, working switches binded to Activation Groups, and high visibility custom built canopy.
- New livery details, courtesy of Beacon Industries.
- 2 New external cameras: one in the rear belly of the plane (undercarriage), and one facing backwards on top of the hump.
- Can fly unmanned, semi-automonomously, and is VERY survivable.
-New, reworked guided bombs that are FAR MORE STABLE and work crazy well with the CCIP computer.
Known Bugs/Issues!⚠️
When flying in first person view in cockpit, explosions or changes to crafts far away from you, as well as low/choppy framerate may sometimes make the cockpit not render properly. A general fix that works is simply quicksaving and loading the same midflight.
When fully loaded with bombs, some users may experience severe FPS drops. This craft is not recommended for weak performing devices.
GENERAL INFO
- Predecessor: B-44 APPROVED
- Created On: Android
- Game Version: 1.3.204.1
- Price: $57,691k
- Number of Parts: 337
- Dimensions: 8 m x 40 m x 63 m
PERFORMANCE
- Total Delta V: 0m/s
- Total Thrust: 693kN
- Engines: 15
- Wet Mass: 1.38E+5kg
- Dry Mass: 49,499kg
STAGES
| Stage | Engines | Delta V | Thrust | Burn | Mass |
|---|


Amazing